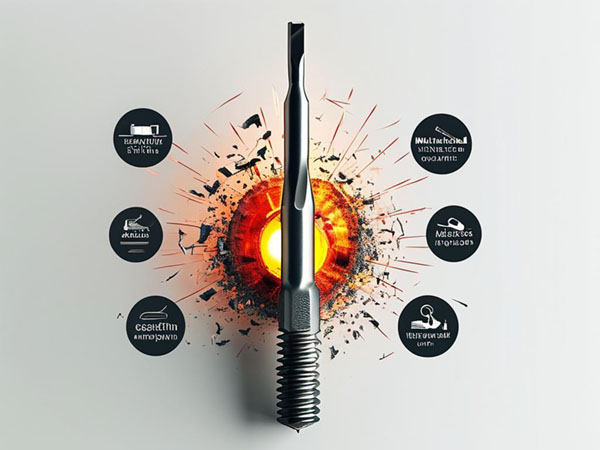
Tap Failure Analysis: Customized Solutions for Enhanced Reliability
Amid the roaring operations of workshops around the globe, unexpected tap breakage and wear are silently eroding machining efficiency. A striking data point reveals the severity of the issue: approximately 60% of premature tap failures result from material mismatches—for instance, a factory in Vietnam mistakenly used standard taps for machining 440C stainless steel, leading to widespread chipping. Another 25% are linked to environmental or process conditions, such as a Middle Eastern facility neglecting the high sulfur content in 1215 free-machining steel, causing severe chip adhesion in the tap flutes.
Behind these failures lies a complex interplay of material characteristics, equipment condition, and process parameters. This article, drawing from over 2,000 real-world failure cases in cross-border manufacturing, decodes the failure logic through fracture morphology and chip behavior, offering a full-spectrum solution from selection to maintenance. Whether it's work-hardening in 304 stainless steel or lubrication challenges in ductile iron, you’ll gain a set of diagnostic tools and optimization strategies that are immediately applicable.
Fracture Failure
- Symptoms: Complete or partial tap breakage, with fracture surfaces appearing flat (brittle failure) or spiral-shaped (torsional overload).
- Primary Causes:
- Material Overload: Machining materials with excessive hardness (e.g., hardened steel > HRC 50)
- Incorrect Parameters: High spindle speed (e.g., >250 rpm for M10 taps on 45# steel) or undersized pre-drilled holes
- Equipment Defects: Spindle runout >0.08 mm or loose collets
- Solutions:
- Use powder metallurgy taps (e.g., ASP2030) to enhance torsional strength
- Follow the principle of "low speed for hard materials" (e.g., 80–120 rpm recommended for 304 stainless steel)
- Perform regular equipment precision checks (at least monthly spindle runout tests)
Cutting Edge Wear
- Symptoms: Uniform wear bands on the cutting edge (flank wear >0.2 mm) or localized chipping.
- Key Factors:
- Abrasive Wear: From hard inclusions (e.g., carbide particles) in cast iron
- Diffusion Wear: Elemental interdiffusion between the coating and workpiece at high temperatures (common in titanium alloy machining)
- Supporting Data:
- Uncoated HSS taps machining HT250 gray cast iron showed wear of 0.15 mm after every 50 holes
- TiAlN coatings raise heat resistance to 600°C, extending tool life by 3–5 times
- Countermeasures:
- For cast iron, prefer uncoated taps to avoid accelerated wear from coating delamination
- For high-temp alloys, apply multilayer gradient coatings (e.g., AlCrN + TiN)
Chip Adhesion
- Symptoms: Metal chip buildup in spiral flutes, resulting in poor evacuation or jamming.
- Typical Scenarios:
- Tapping sticky materials (e.g., aluminum alloys, pure copper) without using dedicated taps
- Inadequate cooling leading to thermal adhesion (common in deep hole tapping of 304 stainless steel)
- Case Comparison:
- Standard straight-flute tap on 6061 aluminum: manual chip removal required every 3 holes
- Spiral flute tap (right-hand 35° helix): 20 continuous holes with no chip adhesion
- Optimization Strategies:
- Use taps with helix angles >30° for aluminum machining
- Apply cutting fluids with EP (extreme pressure) additives, such as sulfurized fatty oil-based coolants
Thread Accuracy Deviation
- Symptoms: Out-of-spec pitch diameter, distorted thread profile, or surface roughness exceeding Ra 3.2 μm.
- Cause Matrix:
| Defect Type | Primary Cause | Secondary Cause |
|---|
| Oversized pitch diameter | Tap wear | Oversized pilot hole |
| Crest collapse | Excessive axial force | High ductility of material |
- Inspection Standards:
- Three-wire method pitch diameter deviation must be <0.05 mm
- Thread plug gauges (Go/No-Go) must pass 100%
- Preventive Measures:
- Inspect cutting edge under a microscope every 100 holes
- For copper materials, use taps with 10°–12° rake angle to reduce extrusion
Coating Peeling
- Symptoms: Flaking of coating at the cutting edge, exposing the base material.
- Failure Mechanisms:
- Thermal mismatch: Coefficient of thermal expansion difference >2×10⁻⁶/°C between coating and substrate
- Surface contamination: Incomplete pre-coating treatment (e.g., sandblasting residue or detergent contamination)
- Key Process Controls:
- Use graded transition layers (e.g., Ti → TiN → TiAlN)
- Control substrate surface roughness within Ra 0.4–0.8 μm
- Empirical Data:
- Ion-nitrided substrates show >50% improvement in coating adhesion
Vibration
Observable Features:
- Microscopic: Repeating micro-chipping at 0.1–0.3 mm intervals on the edge
- Macroscopic: Periodic waviness on thread surface (peak-to-valley >15 μm)
- Auditory Clues: Low-frequency humming during machining (200–500 Hz)
Vibration Source Diagnostic Matrix:
| Vibration Type | Frequency Feature | Typical Cause | Diagnostic Tool |
|---|
| Forced Vibration | Integer multiples of spindle speed | Spindle eccentricity, unbalanced chuck, gear wear | Spectrum analyzer (FFT) |
| Self-Excited Vibration | Broadband random | Resonance from speed/feed combo, excessive overhang (L/D > 4) | Cutting force + time-domain analysis |
| Material-Induced Vibration | Discrete pulses | Hard phases in cast iron, layer transitions in composite materials | Acoustic emission sensors |
Application Case Studies
- Case 1: Automotive Parts Plant, Mexico
- Issue: M12 tap lifespan only 80 holes on ADC12 aluminum (expected >300 holes)
- Diagnosis:
- Vibration acceleration showed 3× frequency spike → spindle bearing wear
- SEM revealed micro-chipping every 0.2 mm → correlated to vibration pattern
- Solution: Replaced spindle bearings + used anti-vibration toolholders → lifespan restored to 320 holes
- Case 2: Valve Manufacturer, India
- Issue: Thread surface roughness on 316L stainless steel worsened from Ra 1.6 to 6.3 μm
- Findings:
- Vibration velocity rose from 0.5 mm/s to 4.8 mm/s (exceeded ISO 10816-3)
- FFT showed dominant 248 Hz → matched tap’s natural frequency
- Fix:
- Adjusted speed from 120 rpm → 95 rpm to avoid resonance
- Installed damping unit → vibration amplitude reduced by 72%
Four-Step Vibration Control Method
- Source Suppression
- Use anti-vibration taps (e.g., with internal coolant channels, reducing vibration energy by 30%)
- Carbide taps exhibit 40–60% lower vibration than HSS
- Parameter Optimization
- Critical speed formula:
(k: system stiffness, m: equivalent mass)
- Feed rate tuning: every 0.02 mm change can shift vibration frequency by 5–10 Hz
- System Reinforcement
- Keep L/D < 3 → each halving of length increases stiffness 8×
- Use hydraulic chucks → reduce vibration by 50% vs collet holders
- Real-Time Monitoring
- Use portable vibration pens for quick shop floor checks
- Wireless smart shims in toolholders transmit data to mobile apps
Interrelation Between Vibration and Other Failures
- Vibration → Accelerated Wear: 0.1 mm amplitude increases coating wear rate by 3×
- Vibration → Chip Adhesion: High-frequency motion increases chip re-welding probability by 70%
- Vibration → Thread Deformation: 0.05 mm radial vibration may cause 0.02 mm pitch diameter deviation
On-Site Quick Diagnosis Methods
- Coin Test: Stand a coin on the machine casing—if it tips over during operation, vibration exceeds tolerance
- Sandpaper Test: Lightly touch tap shank with sandpaper; friction pattern indicates vibration direction
- Smartphone App: Use apps like VibSensor for basic spectrum analysis (±5 Hz accuracy)
Golden Rules of Failure Diagnosis
- Start with the Fracture Surface: Analyze morphology to identify root cause (brittle, fatigue, overload)
- Chip Observation Comes Next: Shape and color offer clues to parameter mismatches
- Thread Check Validates Wear Stage: Profile errors often trace back to tool condition
- Don’t Ignore the Environment: Review shop temperature, humidity, and coolant pH—often overlooked variables
Advanced Insights: Hidden Factors Impacting Tool Life
Environmental Controls
- In high-humidity regions (e.g., Indonesia), apply anti-rust oil daily
- In regions with >15°C daily variation, use climate-controlled cabinets
Thread Standard Differences
- UNC (US) vs DIN (Germany): Thread angle 55° vs 60° impacts tap selection
- JIS (Japan) special threads require specific gauges (visual guide available)
Transport & Storage Precautions
- Wrong: Shipping full tap boxes by sea (salt fog corrosion cases)
- Right: Vacuum packaging + desiccant (adds only $0.3/unit)
Conclusion: Rebuilding Machining Reliability Through System Thinking
At its core, tap failure stems from a delicate imbalance among multiple variables in the metal cutting process. From a customer in Bangladesh using soapy water causing corrosion, to an Indian factory's spindle retrofit triggering off-axis breakage, real-world cases reveal a fundamental truth: tool life depends on coordinated adaptation of material, equipment, and environment. Field data shows that a well-maintained system—e.g., controlling spindle runout ≤0.05 mm and deploying anti-rust measures tailored to climate—can extend tool life by over 40%.
More crucial, however, is establishing multi-dimensional diagnostic logic: when thread gauges fail, check pilot hole size and clamping simultaneously; when chip color changes, adjust both speed and coolant strategy. This marks a shift from experience-driven to data-driven decision making. In the era of smart manufacturing, treating each failure as a system self-warning is the key to building long-term competitiveness on the global stage.


 We like to do design according to all the customers' requirements, or offer them our new designs. With strong OEM/ODM capabilities, we can fill your sourcing demands.